
TIRED OF YOUR BEDROOM?
When you’re super busy and the days are filled with the usual stuff like work, shopping, cooking, family and the million other things on the daily to-do list, it can feel a little bit like chaos sometimes. But, there’s always the end of the day to look forward to. Isn’t there?
That moment where you decide its time. It’s time that this day ended, you have done enough…though you probably think you haven’t. ;-(
Anyhow, there are no more hours left which is actually a blessing because it means it’s time to slow down, unwind, regroup with yourself and retreat to de-stress in your bedroom.
If your room is a calm, cocooning, restful, nurturing space, you’re going to immediately feel a little bit better, hopefully, more relaxed as you become enveloped in the sumptuous atmosphere where you’ll rest and recharge.
If, on the other hand, it isn’t quite so calming and isn’t quite hitting the mark, have a look at how this rather bland bedroom was transformed from a boring, functional and drab space into something a whole lot more sumptuous and appealing.
It’s from one of my houses that were being made ready to sell, so the ideas are low cost but very, very effective. You can certainly use these ideas if you’re putting yours on the market, and equally, if its a quick and easy budget upgrade to a bedroom that has been neglected (for years), then this is for you too.
If you are selling up soon, read HERE why you need to pretty things up!
MASTER BEDROOM BEFORE AND AFTER PHOTOS
Here’s what it looked like before. I told you, just totally uninspiring. Functional and far, far from fab!
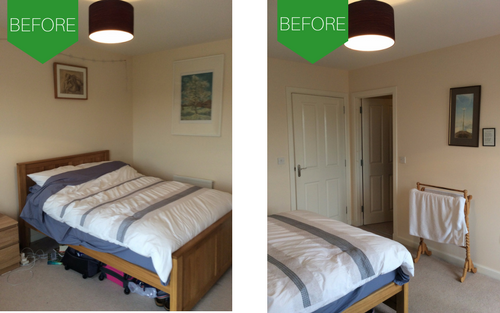
It doesn’t look anything like what a master bedroom should – a master bedroom should really be very distinguishable from the other rooms and offer more in the way of serenity and luxury. It doesn’t have to be all velvets and golds and opulence though if it’s a cooler natural Scandi look you prefer, it’s your choice, just follow the same rules.
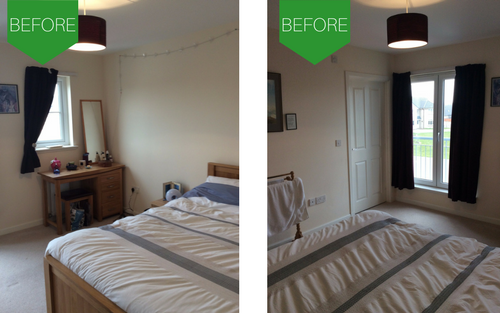
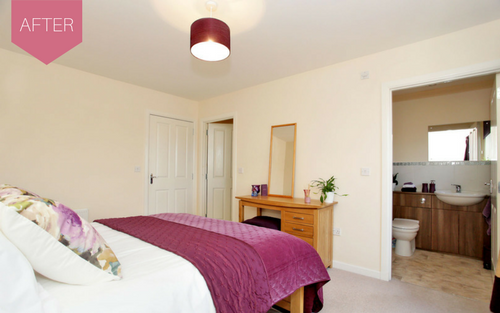
Here are some more angles so you can see more of the room.
AND…DRUMROLL… here’s what it looks like now!
Can you totally believe the difference?
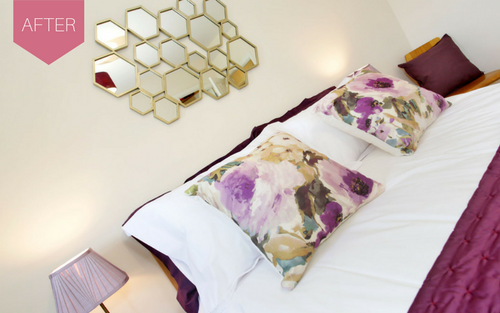
Loooooving that statement mirror! (from M&S)
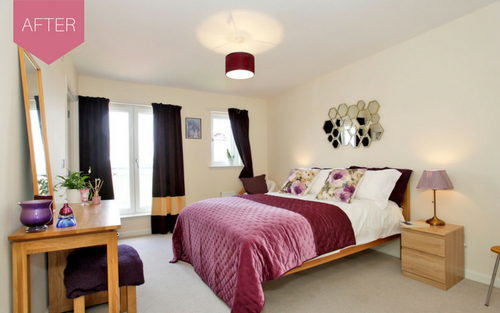
Totally new layout and colour scheme too! (same furniture)
The room was such a lovely big size, which was just being wasted. Lots of times I’m faced with the challenge of dealing with pokey rooms and have to pull out all my tricks to get them properly furnished, while still looking as spacious possible, leaving enough room to move around without bashing one’s shins while squeezing past oversized pieces! ?
But here, there was an abundance of space that was just not being used.
1. BETTER FURNITURE LAYOUT
The bed was moved and centred on the largest wall because things often look better when they are balanced…in the middle of a wall. That then meant the dressing table didn’t have enough free space around it, so it was moved too. This helped as all the items had been clumped together at one side of the room.
And, note how the dressing table is in the centre of that other wall now too.
If you are looking at your own layout, the bed is usually best placed opposite the door on a wall without a door or window on it.
And incidentally, a piece of furniture I’d absolutely love, but don’t have space for, is an upholstered wide seat/bench thing (or two identical stools) at the bottom of the bed. Just because it looks both very useful and very gorgeous. So if you have a big room, consider thus!
2. SOMETHING IMMEDIATELY GORGEOUS
This is usually referred to as the focal point, which it’s that place that draws your attention to first , when you walk in. In any bedroom, this is nearly always the bed and the decoration above it, on the wall, including the lamps either side. A few items, closely grouped, are the ingredients for any ‘focal point’.
So, the beautiful and stylish mirror placed at the right height above the bed created just that. And when I say the perfect height…anything hung above a headboard should be closer to the actual bed, than the ceiling.
This is usually always lower than you think!
3. MUCH NEEDED COLOUR
Deciding on how you want a bedroom to feel will help you choose the best colour or colour combinations. With this one, I didn’t want to bother painting the walls as the warm light colour is perfect when selling, but the blue stripes were doing nothing to add any sense of luxury. This lovely rich claret red tone invokes energy and *cough passion and being a warm colour is perfect to give that cosy and more glamorous note.
It was also a good choice as the curtains were a similar colour and I didn’t want to replace them which would eat into the limited budget.
The trick with adding an accent colour like this is to repeat it in a few places around the room… so it appears here in:
– the bed cover
– the cushions
– the pendant
– accessories – the table lamps are a lighter shade of the same colour
If you’d love to learn more about accent colours, I have a FREE MASTERCLASS (lasts about 45 mins) which you can have immediate access to here FREE ACCENT COLOUR MASTERCLASS
4. PLUSH CURTAINS
Even if your window doesn’t come down to the floor, it’s a good idea to make sure your curtains do. There’s something about short curtains that is just way off the mark when you’re trying to create a lux sophisticated vibe. In this room, I suggested that instead of buying new curtains the original ones were lengthened. This can be done by buying a piece of contrasting fabric and literally stitching it on. The owner of this house was rather skilled with a needle and thread and so the result was rather stunning and more intricate!
The other window had the position of its curtain switched, which just looked better and a lovely orchid on the sill that picked up the purply-pinks decorated that area a bit more as it looked bare-ish.
5. PILLOWS
Leaping into a beautifully dressed bed has a seriously different feel than getting into an unmade and uninspiring one, I’m sure you’ll agree!
There are some essential ingredients if you want the former…
You wouldn’t think that having 4 pillows on a bed would make such a difference but they do…and the oxford style of pillowcase is a must. White is such a classic for bedding that you can never go wrong and the purer the fabric the better…cotton with a high thread count or linen exudes a greater level of luxury than polycotton.
Any size of throw will literally add another layer to complete the look.
Don’t forget some contrasting scatter cushions and DO fill them with a feather filler (unless allergic) you won’t believe the difference!
6. CHILL-OUT ZONE
If you are lucky enough to have a really big room, you can always fill that space with a small sofa, or better, a chaise and maybe a little table and another lamp. Or a floor lamp.
In this room, I added a little chair in the corner which is kinda useful for tying your laces, but also for adding another cushion and a woolly throw which looks pretty.
7. LIGHTING
It’s always a good idea to have several types, a chandelier as the central one, above the bed…the one here isn’t that exciting, but you could use something quite a bit bigger for drama! Then bedside table lamps can match or not, depends on the style you are going for. For this room they really should have been double their size but, remember, it was all done on a shoe-string, so cash was allocated and some things had to be compromised.
You might also add a desk type lamp on the dressing table to make sure you don’t overdo the make-up on a dark winter’s morn!
8. GREENERY
There were two plants put in to tick the greenery box which, to me, just finishes off any room. And dare I say it, but a good quality faux flower will look just as nice (nearly) if you can’t see how you’d ever keep a real one alive!
That’s a detailed rundown of how the above bedroom was transformed, so if you feel like it’s time you were a bit more pampered at the end of the day, you can always have a look at how you could revive your own master bedroom.

Recent Comments